Blood Pressure Cuff Size Chart: Choose the Right Fit
Affiliate disclosure: As an Amazon Associate I earn from qualifying purchases. MedHelperPro may earn a commission from eligible purchases made through links in this guide, at no extra cost to you. Affiliate availability does not affect our selections. Read the full disclosure.
Research note: Product selections are based on published specifications, policies, and independent evidence unless a guide explicitly describes hands-on testing.
Relevant shopping options: Confirm the exact monitor model, connector, and stated arm range before buying a replacement cuff. A similar-looking cuff may not be compatible.
At a glance
- Measure the midpoint of your bare upper arm in centimeters.
- Use the size range printed on the exact cuff or monitor manual.
- Choose a device validated for the intended user and ask a clinician when unsure.
A home blood pressure monitor is only useful when its cuff fits the arm it is measuring. Check your bare upper-arm circumference against the range printed on the cuff before comparing apps, memory, or other features.
Why cuff size matters
The monitor is designed to work with a stated arm-size range. A cuff outside that range may produce an inaccurate reading. That makes cuff fit a required buying check, not an optional comfort feature.
The American Heart Association's home-monitoring guidance warns that an incorrectly sized cuff can produce an inaccurate reading. Measure the middle of the upper arm and use the range printed on the cuff or in the monitor manual.
How to measure your arm circumference
Use a flexible measuring tape. If you do not have one, use a non-stretch string and measure the marked length against a ruler.
- Sit in a comfortable chair with your arm relaxed at your side and your palm facing upward.
- Find the midpoint between your shoulder and elbow.
- Wrap the flexible measuring tape snugly (not tightly) around your bare upper arm at that midpoint.
- Note the circumference in centimeters.
Record the number in centimeters because many cuff listings use that unit. Measure again if the tape was twisted, angled, or tight enough to press into the skin.
Blood pressure cuff size chart
Cuff labels are not standardized across every monitor. Use the centimeter range printed by the maker of the exact cuff you plan to buy.
| Your measurement | What the cuff listing must show |
|---|---|
| Below the printed minimum | Choose a smaller compatible cuff or a different monitor |
| Inside the printed range | The cuff is size-compatible; check the manual for placement |
| Above the printed maximum | Choose a larger compatible cuff or a different monitor |
| Exactly at an edge | Confirm the fit indicator and ask the maker or a qualified professional if unsure |
Do not rely on “standard,” “large,” or “wide range” by itself. Two brands can use the same label for different measurements. Product photos should show the range, and the manual should name compatible replacement cuffs.
How much of your arm should the cuff cover?
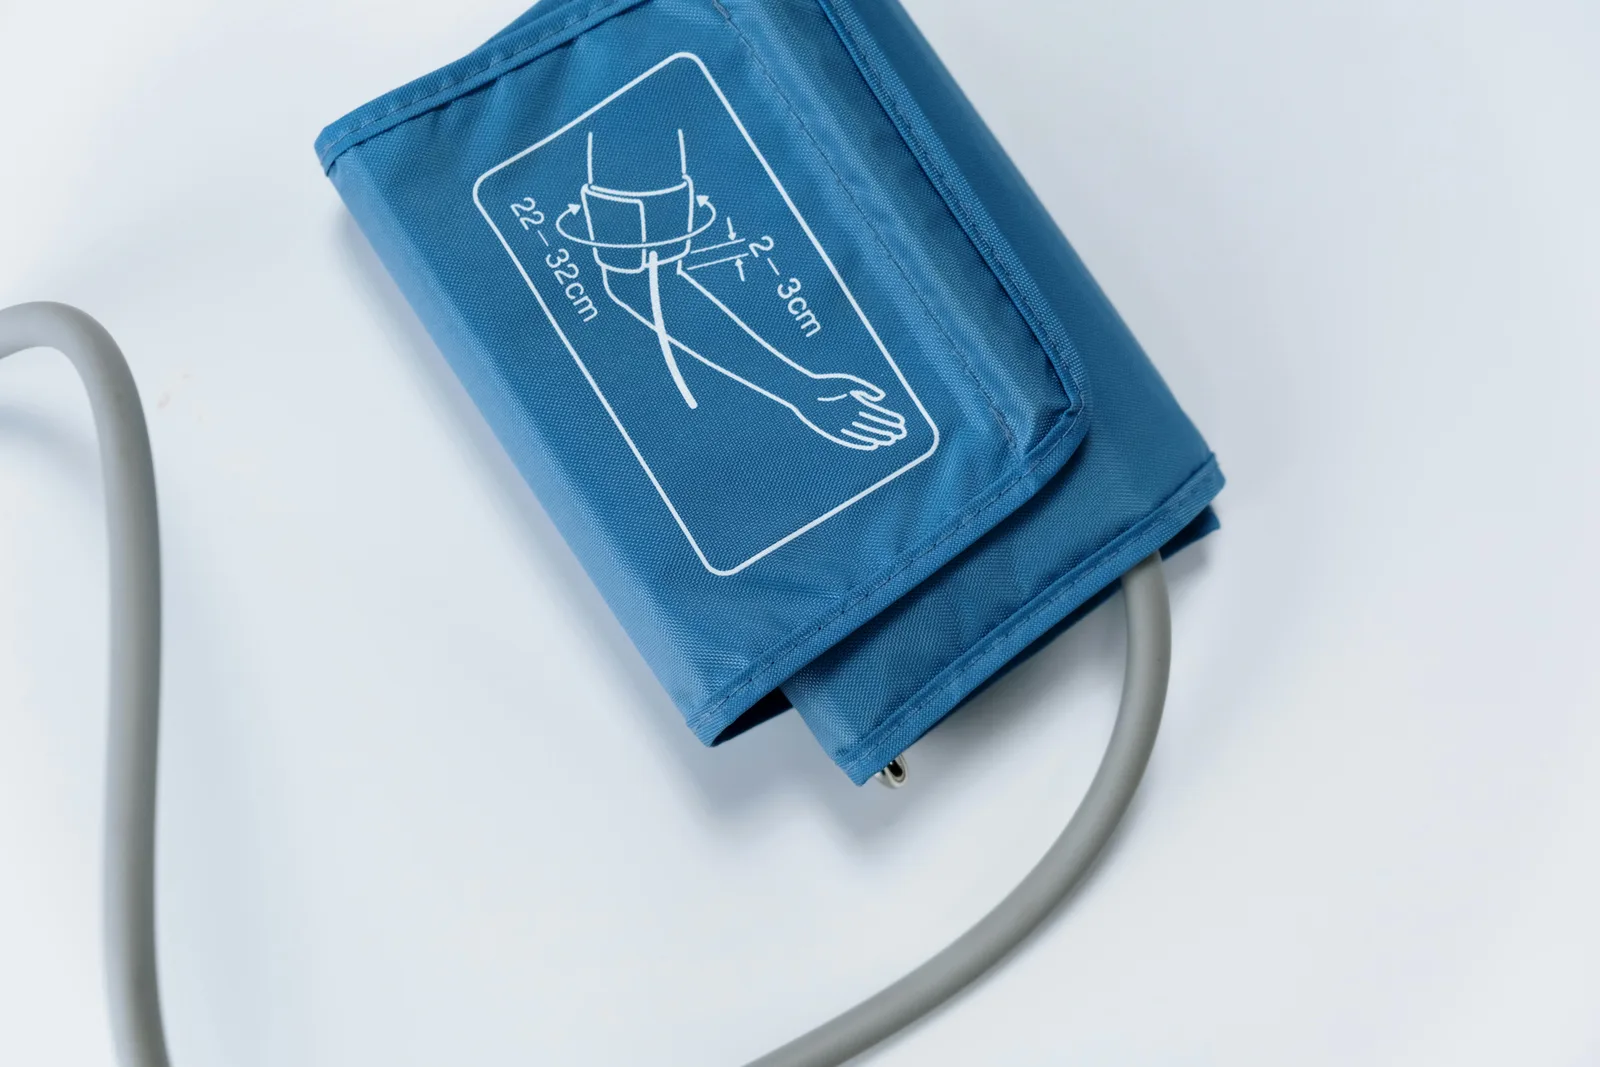
A properly sized blood pressure cuff should sit on bare skin, wrap smoothly around the upper arm, and keep the printed range marker inside the cuff's fit zone. Follow the exact placement diagram in the manual because markers and tubing positions can differ.
This is why a blood pressure cuff size chart is based on arm circumference, not body weight. If the cuff closes but the marker falls outside the fit zone, the cuff is still the wrong size. Use the size range printed on your exact cuff or monitor manual when it differs from a general chart.
Use the manufacturer's instructions for placement and tightness. If the cuff range does not include your measured arm circumference, choose a different cuff or monitor instead of trying to make the fit work.
Upper arm vs. wrist cuffs: does size still matter?
Wrist blood pressure monitors are compact, but technique matters. The wrist must stay at heart level during the measurement. The American Heart Association recommends an automatic upper-arm monitor for most home users, while ValidateBP notes that a validated wrist device may suit some people who cannot use an upper-arm cuff.
Wrist cuffs still have a printed circumference range. Check it before buying and follow the placement instructions for the exact model.
If you do use a wrist monitor, ensure your wrist is at heart height during the reading and that the cuff is positioned correctly on the inner wrist. Read our related guide on choosing the best home blood pressure monitor for a full breakdown of device types and features.
Check cuff details before checkout
Cuff fit is one of the first things to check when home readings seem inconsistent. The required range is easy to miss on a product listing, especially when a monitor is sold with one standard cuff and larger or smaller cuffs are separate accessories.
Things to watch out for
The "fits any arm" claim: Ignore the slogan and find the measured range. If the seller does not provide it, you do not have enough information to confirm fit.
Wearing the cuff over clothing: Regardless of size, a cuff must always be placed on bare skin. Clothing underneath the cuff, even a thin shirt, can compress unevenly and skew the reading.
Cuff position on the arm: Follow the placement diagram in your monitor's manual. Many cuffs include an artery marker or printed guide. A cuff can be the right size and still give a poor reading when it is upside down, rotated too far, or placed at the wrong height.
Re-measuring after a body-size change: If your arm size may have changed, measure it again before buying a replacement cuff. A cuff that fit before may no longer cover the same range.
What if my arm circumference falls between two cuff sizes?
Use a cuff whose printed range includes your measurement. If two compatible cuffs overlap at your measurement, follow the monitor manufacturer's guidance or ask a pharmacist or clinician which option fits that model.
What size blood pressure cuff do I need?
You need the cuff size whose printed arm-circumference range includes your bare upper-arm measurement. For most adults, that means measuring the midpoint between the shoulder and elbow, then matching the number to the cuff label. If you use a specific home monitor brand, follow that brand's cuff chart first.
Can children use adult blood pressure cuffs?
Children may need a cuff and device validated for pediatric use. Do not assume that a small adult cuff is suitable. If a clinician asks you to monitor a child's blood pressure at home, follow that clinician's equipment and technique instructions.
How do I know if my cuff is too tight or too loose?
Follow the monitor manual. Cuffs use different closure marks and fit indicators, so a generic finger rule is less reliable than the instructions for that model. The cuff should lie on bare skin, stay in position during inflation, and match the printed arm-circumference range.
Measure your arm before choosing a monitor, then confirm that the supplied cuff covers that measurement. Bring the device and cuff to a medical appointment if your clinician recommends home monitoring and you need help checking the technique.
Check cuff compatibility by model number
A cuff that physically connects to a monitor is not automatically approved for it. Manufacturers may use similar plugs across several product lines while specifying different cuffs, air bladders, and measurement ranges. Find the monitor's exact model number, then use its manual or official accessory list to identify compatible replacement cuffs.
When shopping online, compare the printed part number and arm range shown on the cuff itself. Marketplace titles can group several sizes or connector types on one page. Save a screenshot of the selected variant and check the box before opening sealed parts.
Arm shape matters as well as circumference
Two people with the same midpoint measurement may not get the same fit if one arm is more tapered. The cuff should lie smoothly on bare skin and stay in the position shown in the manual. If the edge gaps, the closure barely reaches, or the fit indicator sits outside its marked range, ask the manufacturer or a qualified professional about another compatible size or shape.
Do not force a standard cuff to fit by wrapping it over clothing or placing it somewhere the manual does not specify. If independent home monitoring was recommended, take the monitor and cuff to an appointment so the equipment and technique can be checked together.
Plan for replacement before buying the monitor
- Confirm that the supplied cuff covers the intended user's measured arm.
- Find the official replacement cuff and note its current price.
- Check whether a second user needs a different cuff size.
- Look for a clear cleaning method and inspect the closure regularly.
- Keep the monitor, cuff, tube, and manual together to avoid mismatched parts.
A lower-priced monitor can cost more over time if the correct cuff is unavailable or only sold in an expensive bundle. Cuff range and replacement access belong in the purchase decision from the start.
Sources and further reading
Before you buy or use a product: Confirm current specs, prices, fit, warranty, and return terms on the seller's site. Product needs vary by body, home setup, budget, and comfort preferences.